How It All Works: Applying Paint Protection Film
In our last installment, we talked a bit about the fascinating new technology behind paint protection film – the clear, incredibly strong, resilient, and razor thin urethane film applied to your vehicle to protect the most vulnerable areas of your vehicle from stains, road debris, stones, and scratches.
In particular, we took a deep dive into the mystery of how paint protection film has “self-healing” properties. Any scratch on the surface of your vehicle covered with paint protection film will disappear by simply applying heat to your vehicle’s surface. The science is so advanced that simple heat from the sun while your car is parked outside is enough to activate the “self-healing” process.
Now, we need to go the next phase of the paint protection film story – how it is applied to your car, truck, motorcycle, or other vehicle. We at Tint Tech – Calgary’s number one shop for auto, commercial, and residential window tint, as well as the paint protection film experts – know a bit about paint protection film because it is a major part of our business.
Indeed, more and more of our customers are opting for paint protection film because word is starting to spread that it is one of the best ways to keep your new car or truck looking new for the life of your vehicle. Tint Tech , of course, only employs certified professionals to apply paint protection film for our customers. Call us at 403-968-8468 to speak to one of our experts about whether paint protection film is right for you.
In the meantime, here is a primer on how paint protection film is applied to your car. The process is as much an art form as it is a science, and we pride ourselves on getting a fabulous finish applied correctly the first time, every time.
Application of Paint Protection Film
In theory, applying paint protection film is similar to putting on a band aid. With a band aid you make sure that the adhesive side sticks to your skin, apply it, and you are done. The same goes true for paint protection film. The film has an adhesive side to it, apply it to your vehicle, and then you are done, right? Well, practically speaking it is, as they say, “easier said than done.”
A band aid is small, whereas paint protection film comes in somewhat larger sheets that are difficult to maneuver. Thus, applying the very sticky and thin sheets onto a slick painted surface perfectly, with no bubbles, folds, air pockets, or other mistakes, is virtually impossible for any layperson. Further, the warranties for paint protection films usually require professional installation.
Accordingly, you only want a professional to handle your paint protection film project. Learning how to do the application process right the first time takes years of training and experience.
The application process can take a few hours, depending upon how much of your vehicle you want to protect. Here is a run down of how the process goes.
1st – Cutting the Paint Protection Film to Fit a Part of Your Vehicle
You want your paint protection film to, as you would expect, only cover the painted surfaces on your car or truck. You do not put the film on headlights, the grill, or other non-painted surfaces. To make installation easier, manufacturers of paint protection film have created a library of patterns to cover virtually all of the new cars being made today.
The patterns are intricate and need to be precise, down to the millimeter. Say, for example, you want to protect the front bumper or “bra” of your Tesla Model 3. The installer would find the pattern for the Tesla Model 3 front end, and load the pattern into a digital plotter. Once the sheet of film is loaded into the plotter, the plotter will cut the sheet to exactly cover only the painted surfaces of your Model 3.
There are instances when the installer must do a custom cut of the protection film because there is not a pattern in the manufacturer’s library. That can be done, but requires much more time on the part of the installer to custom cut the film to the precise measurements.
2nd – Preparing the Vehicle’s Surface
Paint protection film needs to be a “second skin” on your vehicle – one that is imperceptible to the naked eye. That is because you want to protect the painted surface, not obscure it. Therefore, the surface of your car or truck must be as clean as possible.
The installer will wash the relevant painted surfaces to get rid of all dirt, debris, wax, road bugs, and any other imperfections on your vehicle.
3rd – Positioning the Film on Your Vehicle
This is where the “art” of applying paint protection film comes into play. Because the installer is dealing with a very strong adhesive that is meant to last for the life of the vehicle, the installer needs to be careful on how the film is positioned on the relevant portion of the vehicle before locking it into place.
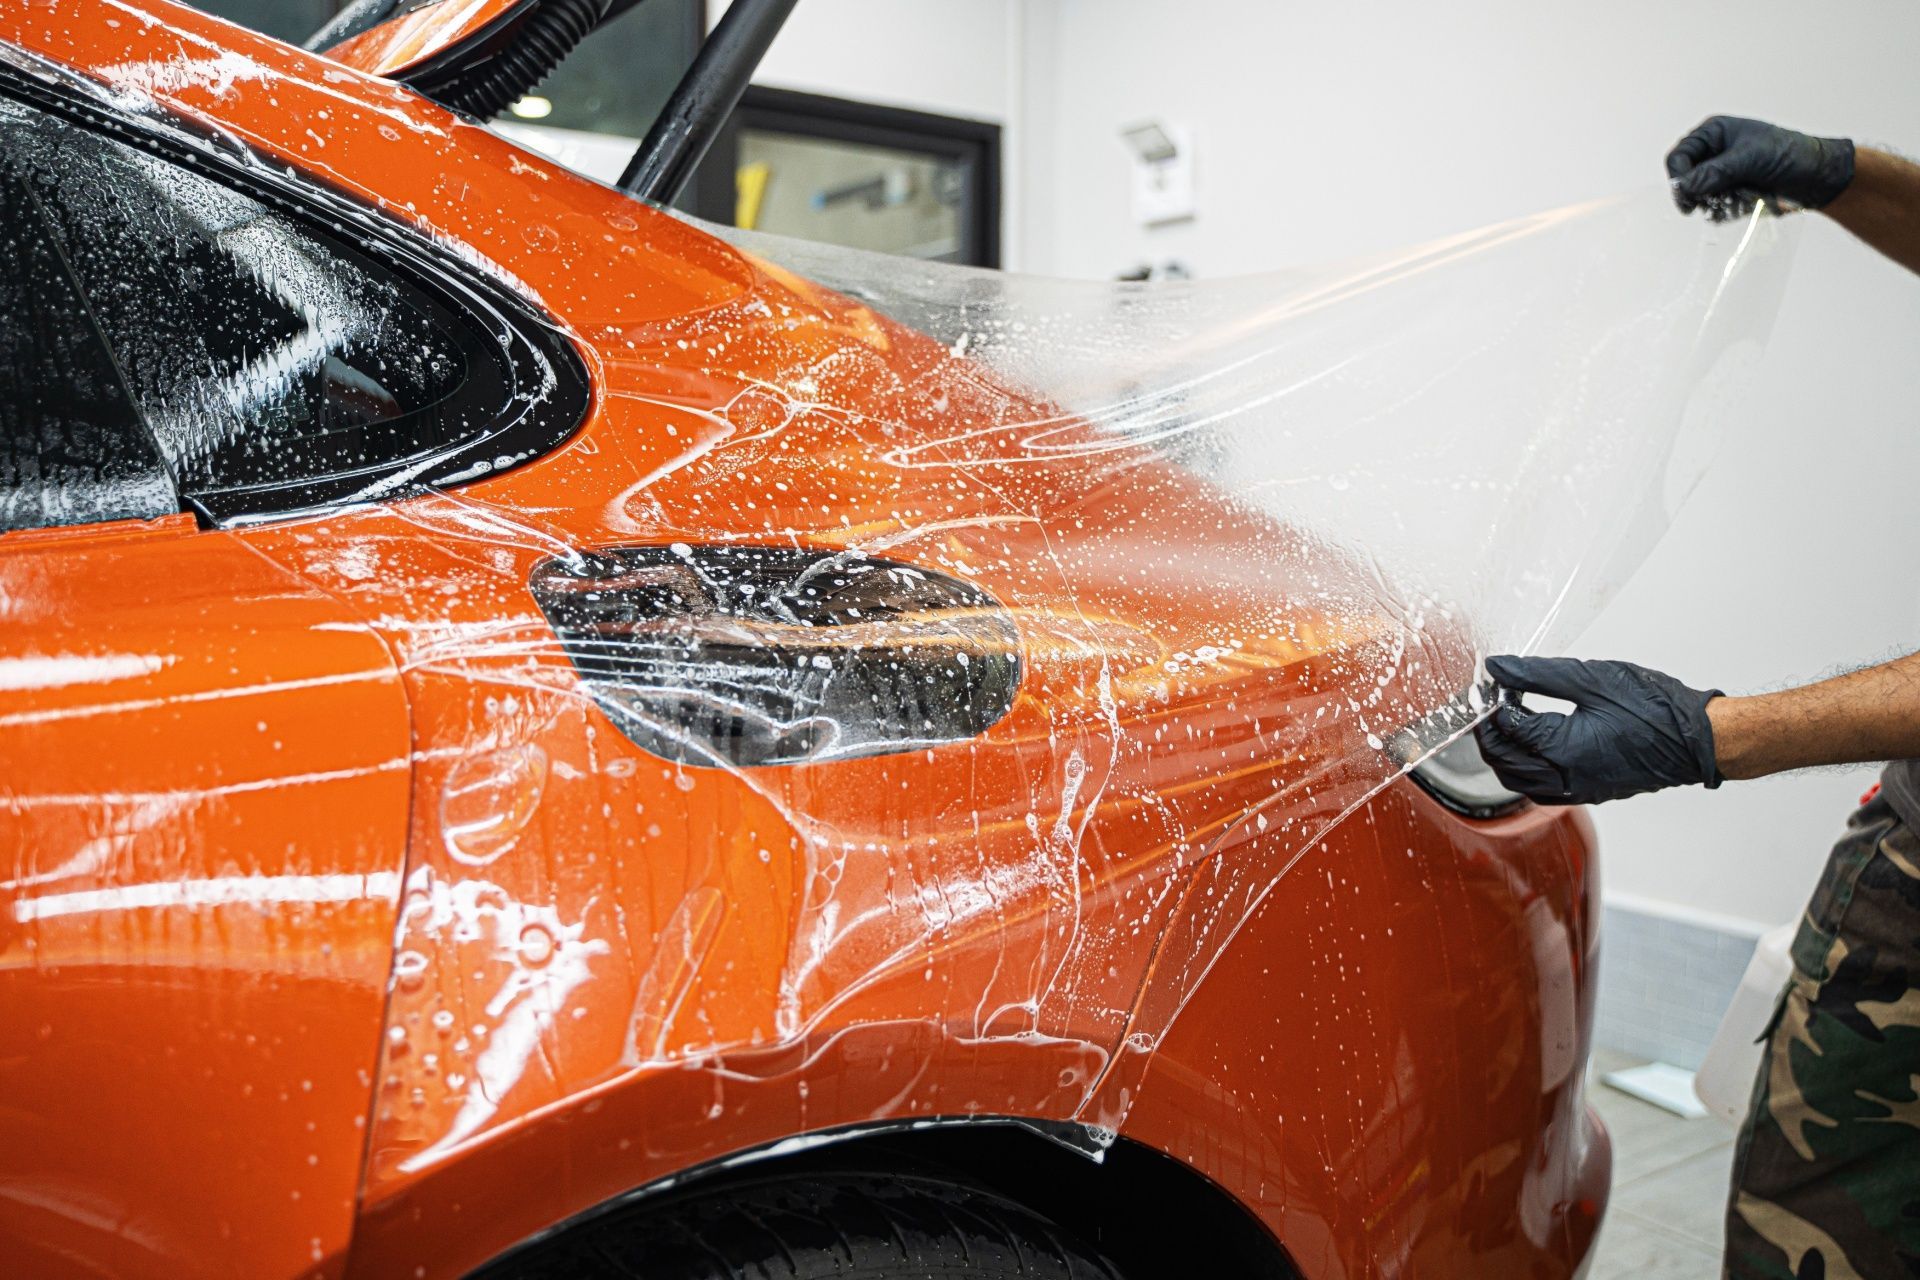
The process to position the film requires an interesting use of what is commonly called a “slip solution.” Using a mixture of baby soap and water (the slip solution), the installer will lubricate the vehicle surface, the paint protection film, and his or her hands with the solution and then lay the film, adhesive side down, on the vehicle’s surface. With the lubrication of the slip solution, the installer can slide the film on the vehicle until it is in just the right place.
4th – Anchoring the Film in Place
Just as the slip solution allowed the installer to move the film on the painted surface until the film was in precisely the right place, the installer next uses a “tack solution” (a combination of water and rubbing alcohol) to lock the film in place. The tack solution allows the adhesive to do its job and stick to the painted surface of the vehicle.
5th – Getting Rid of any Bubbles and Finishing the Edges
Once the installer has anchored the film in place with the tack solution, the installer has a small window of time with a little “play” in the film to get rid of any residual air bubbles under the film. The installer will simply use a squeegee to push away any liquid or air bubbles left under the film. This is done so the entire sheet of film is attached to the vehicle’s surface and the adhesive on the film is allowed to do its work.
In addition, the installer will likely also use a heat gun to make sure all of the edges of the film remain anchored to the vehicle surface. The installer may also use an adhesive primer on the edge to give it that extra amount of staying power.
To Conclude
You want to have your car or truck protected with film to keep it looking brand new. And, you want that film installed by a professional. So, call the professionals today at Tint Tech , 403-968-8468. We are Calgary’s top paint protection film installers , and we are ready to help you love the look of your vehicle as long as you have it.
Disclaimer: The information on this website and blog is for general informational purposes only and is not professional advice. We make no guarantees of accuracy or completeness. We disclaim all liability for errors, omissions, or reliance on this content. Always consult a qualified professional for specific guidance.


